
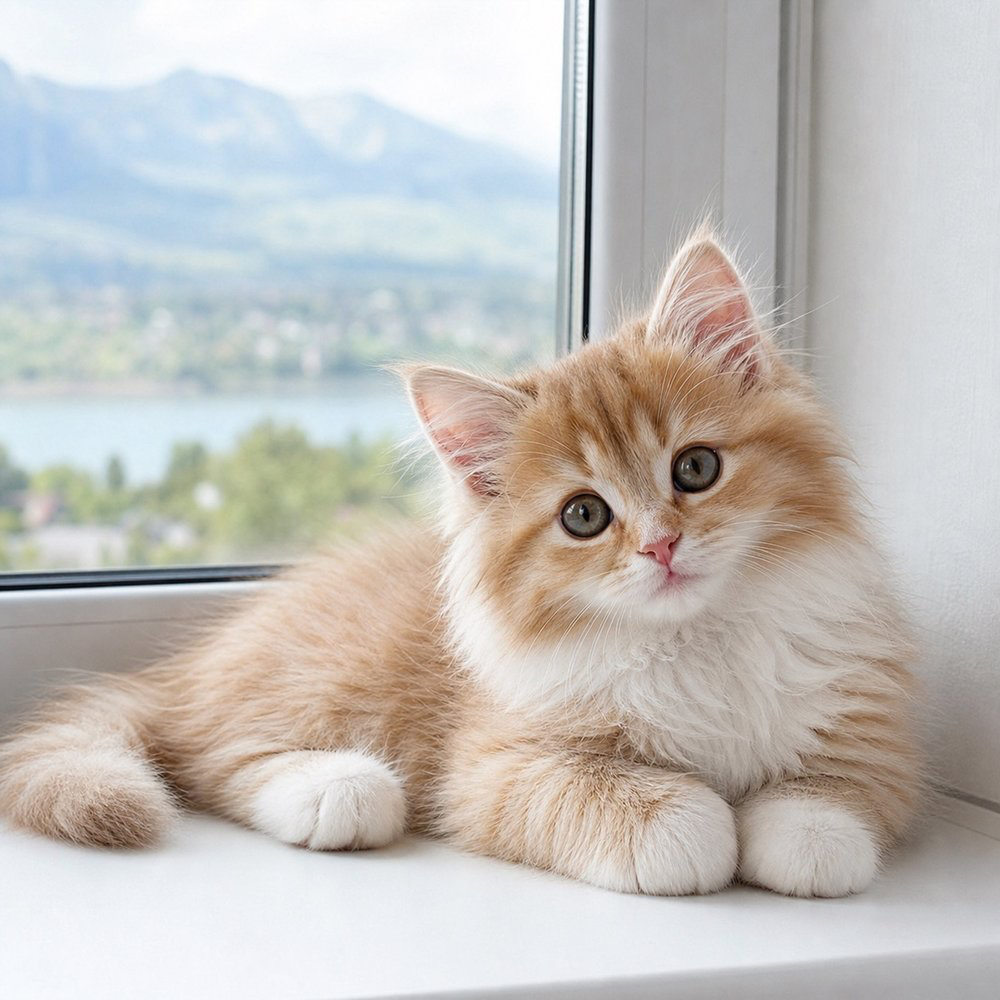
A favourite pet photo usually carries a small story. Your cat has claimed a new windowsill, your dog has fallen asleep after a walk, or a puppy is carrying a toy almost bigger than itself. In Colovia, that image can become a paint-by-numbers picture. The most useful decision comes before you upload anything: choose a frame in which your pet is recognisable and its face does not disappear into furniture, grass or shadow.
This guide follows the photo workflow in the Colovia web app and offers practical ways to choose an image. The screenshots come from the live English interface. For the crop demonstration, we used a kitten illustration from the Artia Club gallery. It is a sample input, not somebody else's private pet photo or a promised preview of what your own finished conversion will look like.
Find the detail that makes this your pet
Look through a few photographs and ask what makes the animal recognisable. It might be a white patch on the forehead, one dark ear, the shape of the nose or a familiar sleeping pose. Choose a frame where that detail is clear. A funny photo can be a lovely memory while still being an awkward starting point for a picture: a blurred face or an object covering the eyes will remain difficult to interpret.
For a first attempt, one pet shown fairly large is a comfortable choice. You do not have to use a close portrait. A dog on a rug or a cat curled up on a chair can work if the animal occupies a meaningful part of the frame. Several small figures surrounded by objects create more things to follow. Consider whether those details add to the story you want to keep.
Check the eyes, nose and boundary between fur and background. A pale cat on a pale blanket may make a beautiful photograph, but its outline can be harder to read than against a darker chair. This does not rule out light images. View the photo at a small size on your phone and see whether the animal's shape still feels clear.
Give the subject room without keeping every distraction
Patterned wallpaper, thin branches and many folds introduce detail that may have little to do with your pet. If the face is the important part, let it occupy more of the picture. Leave some space around the ears and chin, though. A very tight crop can remove the feature that made you choose the photograph in the first place.
Conversion cannot recover an eye hidden in deep shadow or texture missing from an overexposed patch of white fur. For a comfortable first project, another photo with softer, more even light may be a better starting point. You do not need a special photo session. An ordinary picture taken at home can provide all the character the finished work needs.
Try comparing two candidates side by side. One may have the prettier background while the other shows your pet more clearly. For a personal coloring picture, the second may be more rewarding because you will gradually recognise familiar shapes and markings. There is no required pose, breed or coat colour. The useful question is whether the part you care about survives a smaller view.
Open Create from photo in Colovia
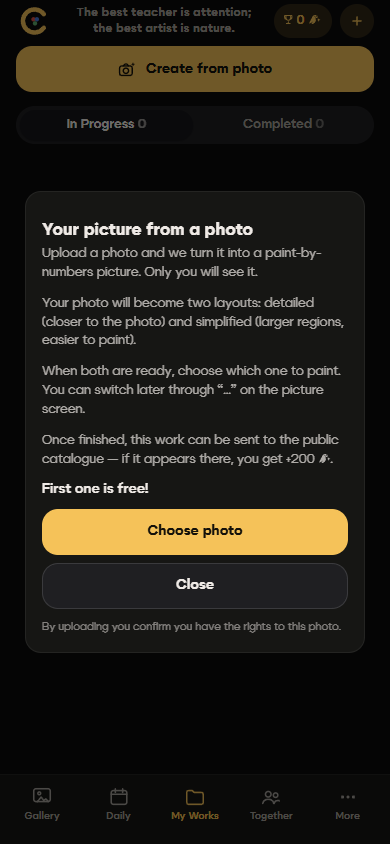
Visit the Colovia page and open the web app. In My Works, select Create from photo. The opening panel explains that the app prepares two layouts, detailed and simplified. It also shows the current creation terms. Read those before continuing, particularly if you have already made pictures from photographs.
Our checked session displayed “First one is free!” That is a statement about the session shown, not a promise of unlimited free conversions. Use the conditions displayed in your own app before creating a picture. Choose photo opens the file selection step. Pick an image you have the right to use, such as a photograph you took of your own pet.
Check the frame before you continue
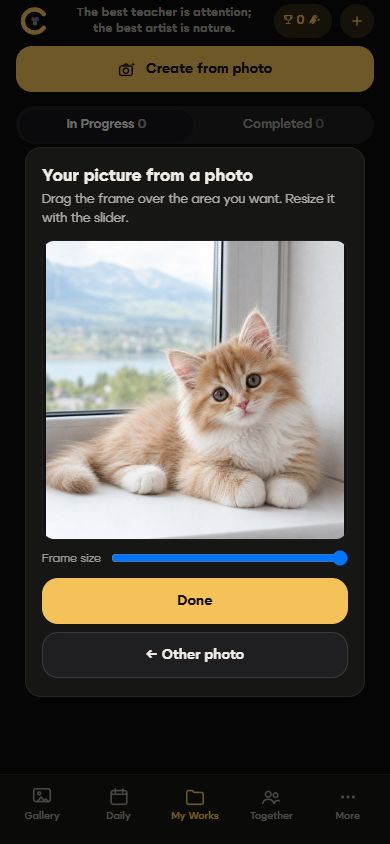
After you select an image, Colovia opens the crop step. Drag the frame to the part you want and adjust its size with the slider. Place the main subject first: the whole face, the head including both ears, or the animal's full body. Then inspect the edges. Is the tail being cut off even though it matters to the pose? Is there a little space above the ears?
Avoid making the crop tiny just to remove every bit of background. Enlarging a small part of the original can also make blur more noticeable. Compare a looser and a closer framing before selecting Done. If neither feels right, Other photo takes you back to choosing an image. It is easier to reconsider here than to continue with a composition you already dislike.
Our screenshot uses Kitten by the window, an existing Colovia catalogue illustration. It demonstrates a clear face, separate ears and a little surrounding space. Your own photograph will look different. This screen shows the selected fragment only; it is not the finished numbered layout produced later in the creation process.
Compare the detailed and simplified layouts
Colovia describes the detailed layout as closer to the source photo and the simplified layout as having larger regions. When both are ready, you can choose which to paint. Examine the areas around an eye, an ear and the nose. Can you follow their boundaries and read their numbers comfortably on the screen you plan to use?
More detail is not automatically the more enjoyable choice for every evening. Larger regions may suit a short session; finer changes in the fur may make the detailed version more appealing another time. Neither option promises to preserve each individual hair. Paint by numbers turns a continuous photograph into separate colour regions, so the image will have a different visual character.
Start somewhere you can locate on the whole picture: a chest marking, an ear or some background beside the face. You do not have to begin with the eyes just because they are expressive. A recognisable larger area gives you a place to become familiar with the layout. Smaller sections can wait until you feel like working on them.
Keep the reason you chose the photograph in view
After filling a few areas, look at the picture as a whole. Does the pose feel familiar? Can you see the marking you like? Does the scene retain something of the original moment? These questions can be more useful than comparing every numbered region with a single strand of fur in the photograph.
There is no need to set a finishing deadline. One session might centre on the background beside the head, another on the fur along the body. If you would prefer an existing animal scene today, explore the Colovia gallery. For a personal picture, begin with one clear image and a considered crop, then let the numbered layout guide your next small step.